How to create a Contact Form Popup?
What is a Contact Form Popup?
The Instant Popup – Contact Form extension for Instant Popup Builder empowers you to create fully customizable, high-converting contact form popups in minutes. Engage visitors at the right moment and capture leads effortlessly, whether you’re collecting inquiries, feedback, or quote requests. With flexible design options, built-in security, and responsive layouts, this extension gives you everything you need to deliver seamless, professional form experiences directly within your pop-ups..
Prerequisites
Make sure the Instant Popup Builder core plugin is installed and activated in your WordPress setup.
How to Create a Contact Form Popup in WordPress (Instant Popup Builder)
This guide walks you through creating a contact form popup using the Instant Popup Builder plugin.
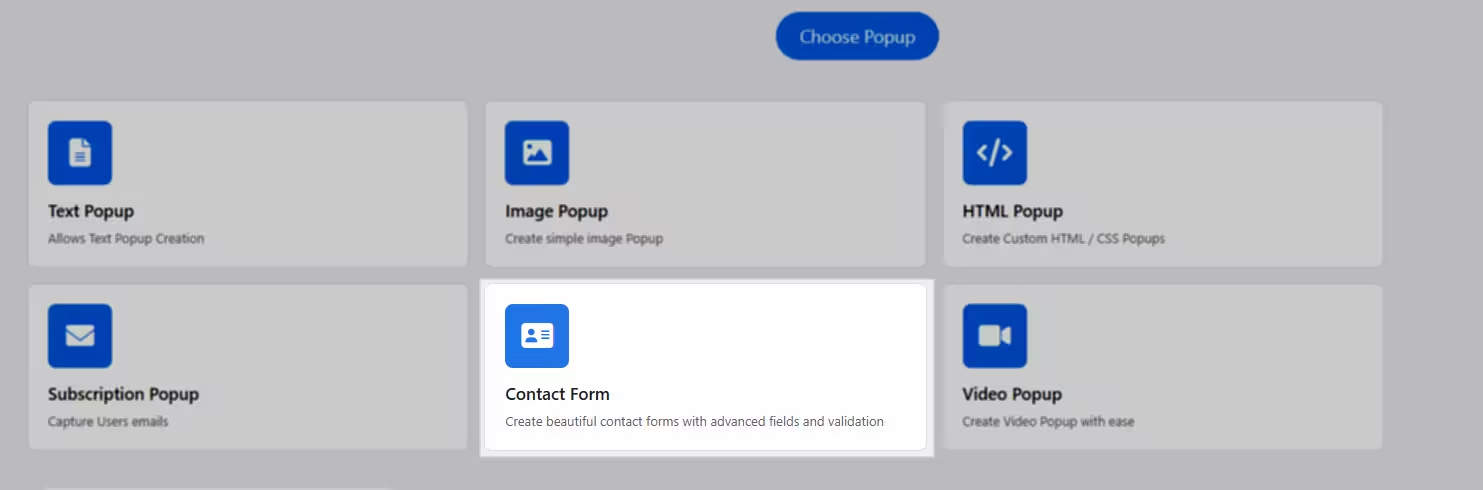
Step 1: Create a New Popup
- In your WordPress dashboard, navigate to Instant Popups → Add New.
- Under Choose Popup, select Contact Form.
- This option allows you to create fully customizable forms with advanced fields and validation.
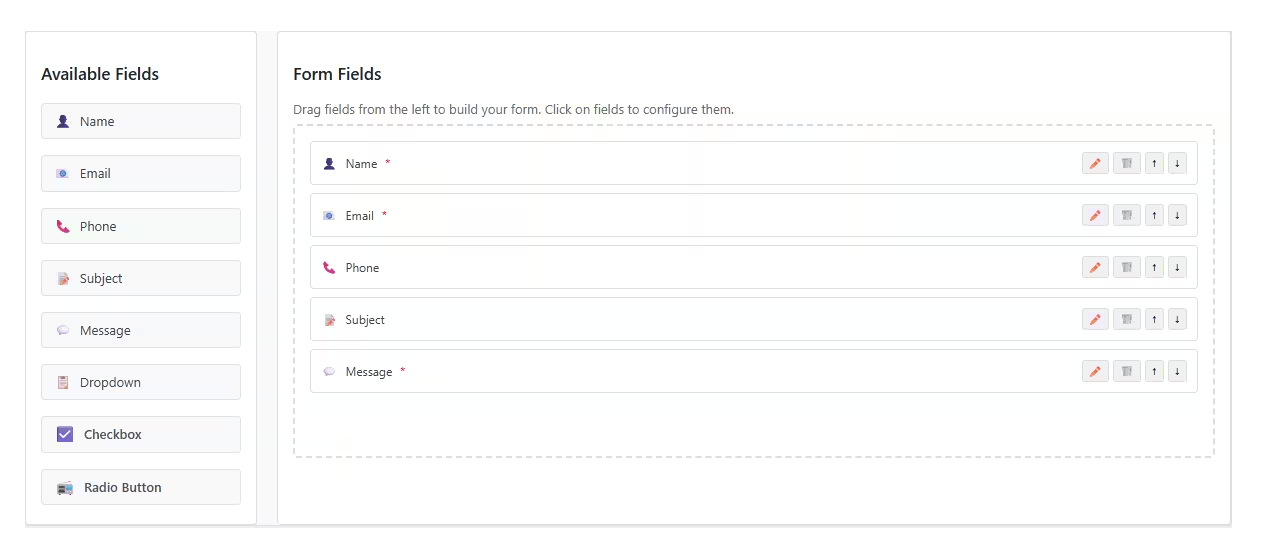
Step 2: Add and Arrange Form Fields
On the form builder screen:
- The left panel shows Available Fields
- The right panel is your Form Layout
To add fields:
- Drag and drop fields from the left panel into the form area on the right.
Available Fields include:
- Name
- Phone
- Subject
- Message
- Dropdown
- Checkbox
- Radio Button
Step 3: Configure Field Settings
Each field can be customized individually:
- Click the Edit button on any field
- Configure options such as:
- Field Label
- Placeholder Text
- Required Field (checkbox)
- Field-specific settings (depending on the field type)
Step 4: Customize the Form
You can personalize the overall form settings:
- Form Title – Displayed to users
- Form Description – Optional helper text
- Submit Button Text
- Success Message
- Redirect After Submit
- Enable reCAPTCHA
- Configure via: Instant Popup → Settings → Contact Form
- Form Layout
- Horizontal or Vertical
- Form Styling
- Colors and design options

Step 5: Publish the Popup
- Configure any additional popup settings as needed
- Click Publish to make your contact form popup live
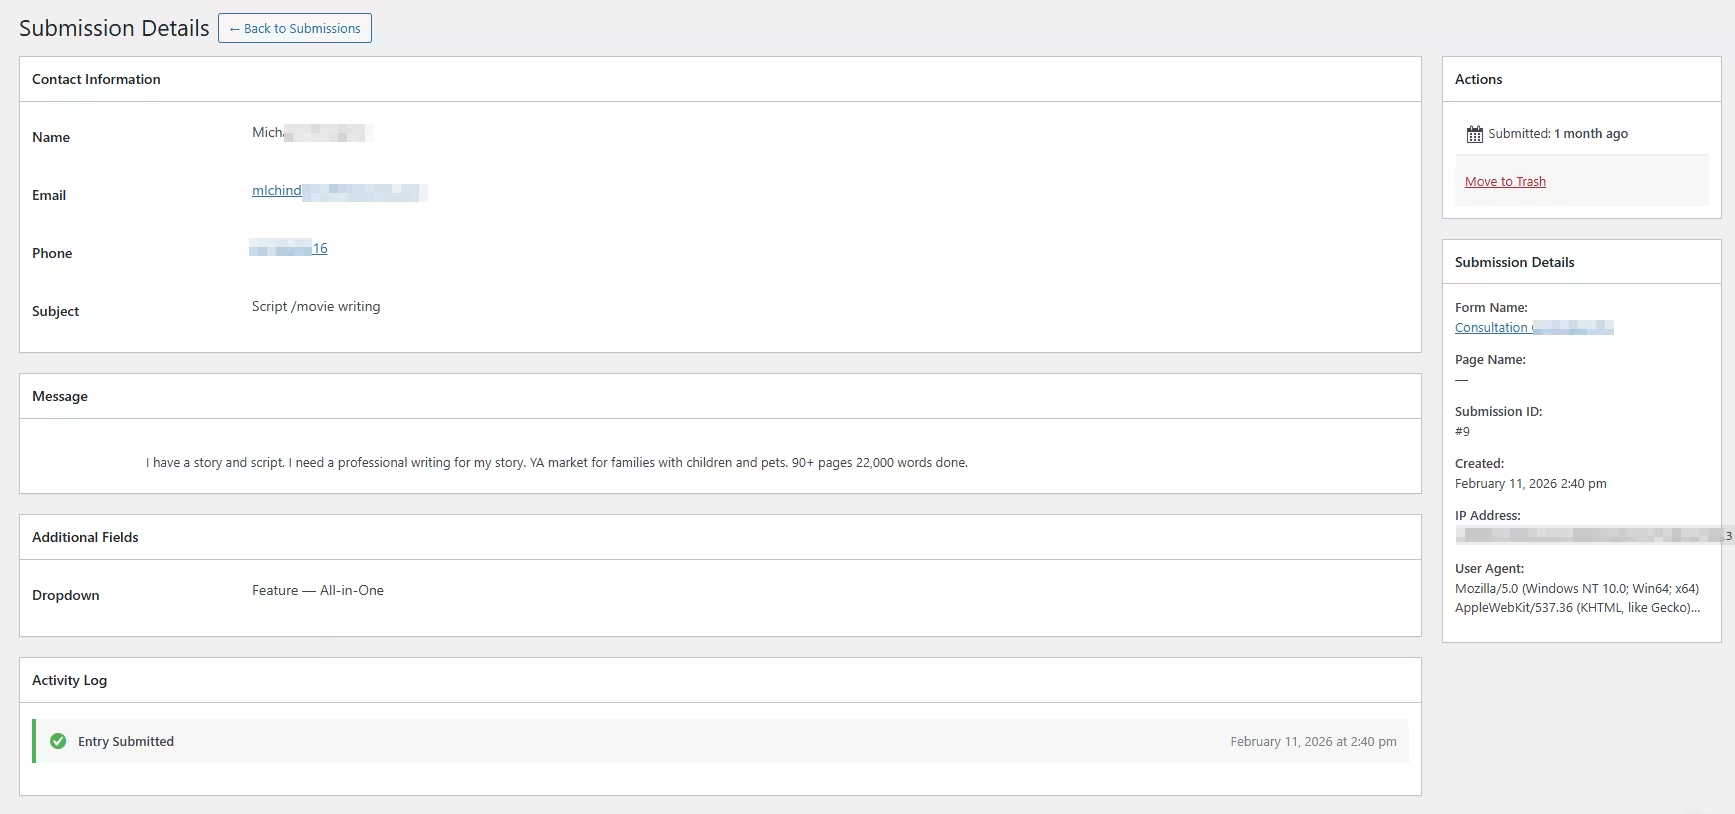
Viewing Form Submissions
End users form submissions are saved under the Submissions, to check:
- Go to Instant Popup → Submissions
- Click on any entry to view full submission details, including:
- Contact information
- Message content
- Additional fields
- Submission metadata (date, IP, etc.)
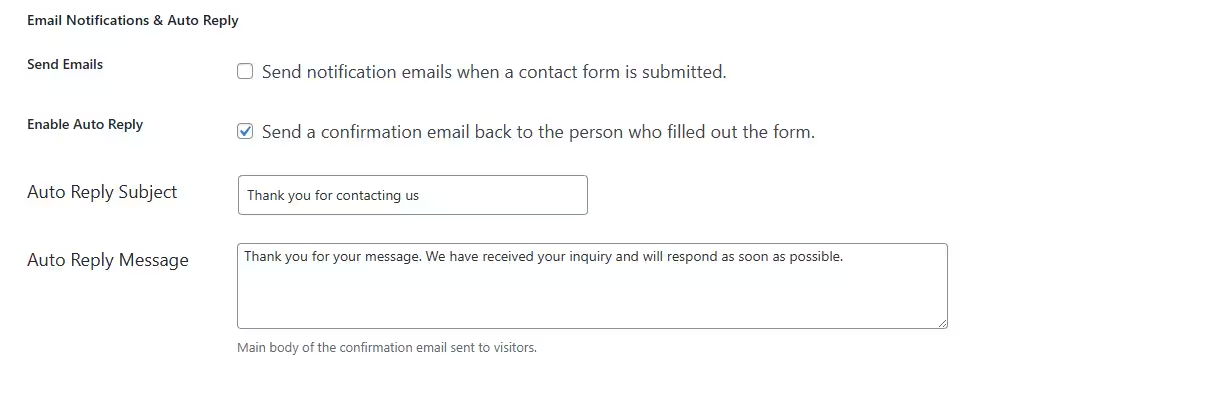
How to Send an Auto Reply for Contact Form Submissions
You can automatically send a confirmation email to users after they submit a contact form using the Auto Reply feature.
Steps to Enable Auto Reply
- Go to Instant Popups → Settings → Contact Form
- Scroll down to the Email Notifications & Auto Reply section
- Enable the Auto Reply option
- Configure your email settings (subject, message, sender details, etc.)
- Click Save Changes
Once enabled, users will receive an automatic confirmation email after submitting the form.
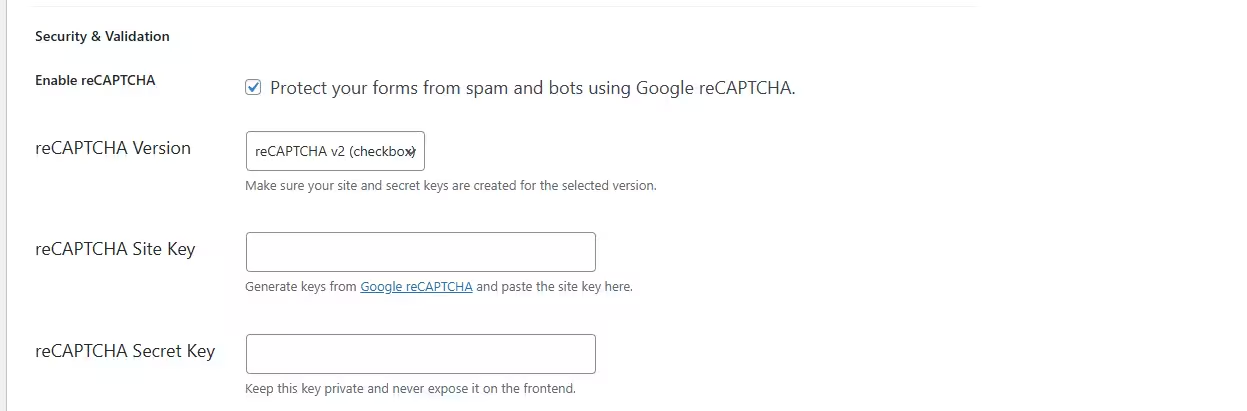
How to Enable reCAPTCHA for Contact Form
reCAPTCHA helps protect your forms from spam and automated submissions.
Steps to Enable reCAPTCHA
- Go to Instant Popups → Settings → Contact Form
- Scroll down to the Security & Validation section
- Enable reCAPTCHA
- Select your preferred reCAPTCHA Version from the dropdown
- Enter your:
- reCAPTCHA Site Key
- reCAPTCHA Secret Key
- Click Save Changes
With Instant Popup Builder, you can quickly create powerful, customizable contact form popups using a simple drag-and-drop interface, no coding required.