
How to Install an Instant Popup Builder Extension
Installing extensions in Instant Popup Builder is quick and easy. Just follow the steps below:
Step 1: Access Your Extension Files
Once you complete your purchase, your extension files will be immediately available in your account.
- Visit: https://instantpopupbuilder.com/my-account/
- Sign in if you’re not already logged in.
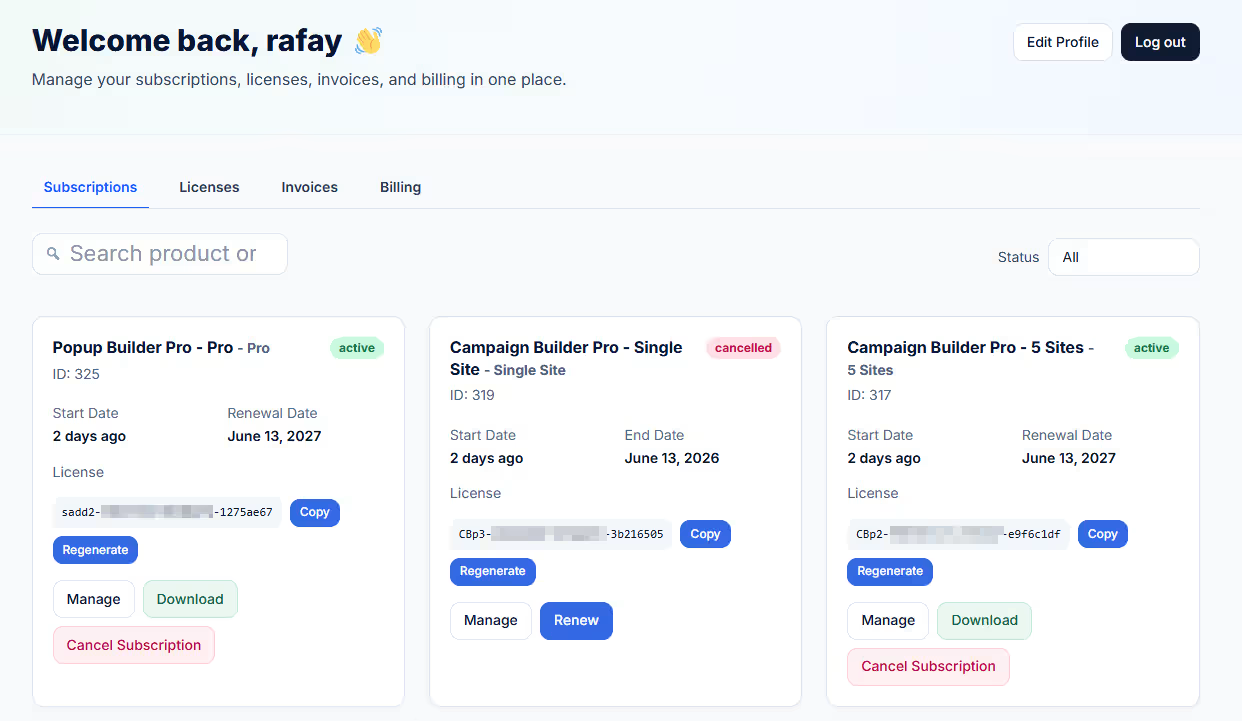
- If you are not on the Subscriptions Page, go to the Subscriptions Page.
- Search the Purchased extension or find it in the list and click on the Download button – it will automatically save to your computer.
Step 2: Install the Extension on WordPress
- Go to your WordPress admin dashboard.
- Navigate to: Plugins > Add New
- Click on Upload Plugin at the top.
- Click Choose File, locate the downloaded extension file on your system.
- Click Install Now and then Activate once the installation is complete.
Step 3: Add Your License Key
After activation, you must enter the license key to activate the extension.
- Go to your Instant Popup Builder Dashboard, choose the Extension you just installed, and click on COPY next to the license Key.
- Go back to your WordPress Dashboard, under Instant Popup > License, paste your license key, and click on Activate.
- You will see a VALID green text.
You’re all set! Without the license key, the extension will not function.
Once the extension is installed and activated with a valid license key, you can start using its features immediately.