How to Schedule Popups by Date, Time, and Recurrence
The Scheduler Popup extension in Instant Popup Builder lets you control exactly when your pop-ups appear. Instead of showing a pop-up all the time, you can configure start and end dates, specific times of day, and even recurring schedules. This feature is perfect for time-sensitive promotions, seasonal campaigns, event announcements, or limited-time offers.
By using a pop-up scheduler, you ensure that your campaigns run automatically without needing manual activation or deactivation.
Step 1: Open Scheduling Settings
- Log in to your WordPress dashboard.
- Go to Instant Popup > Dashboard and select the popup you want to configure, or create a new one.
- In the pop-up editor, go to Popup Settings > Conditions.
- From the left-hand menu, click on Scheduling.
Here you’ll find options to set Dates, Times, Time Zones, and Recurrence rules for your pop-up.
Step 2: Configure Date Range
- Start Date → The popup will begin showing from this date.
- End Date → The popup will stop showing after this date.
For example, if you are running a 3-day flash sale, set the start date to the first day of the sale and the end date to the last day.
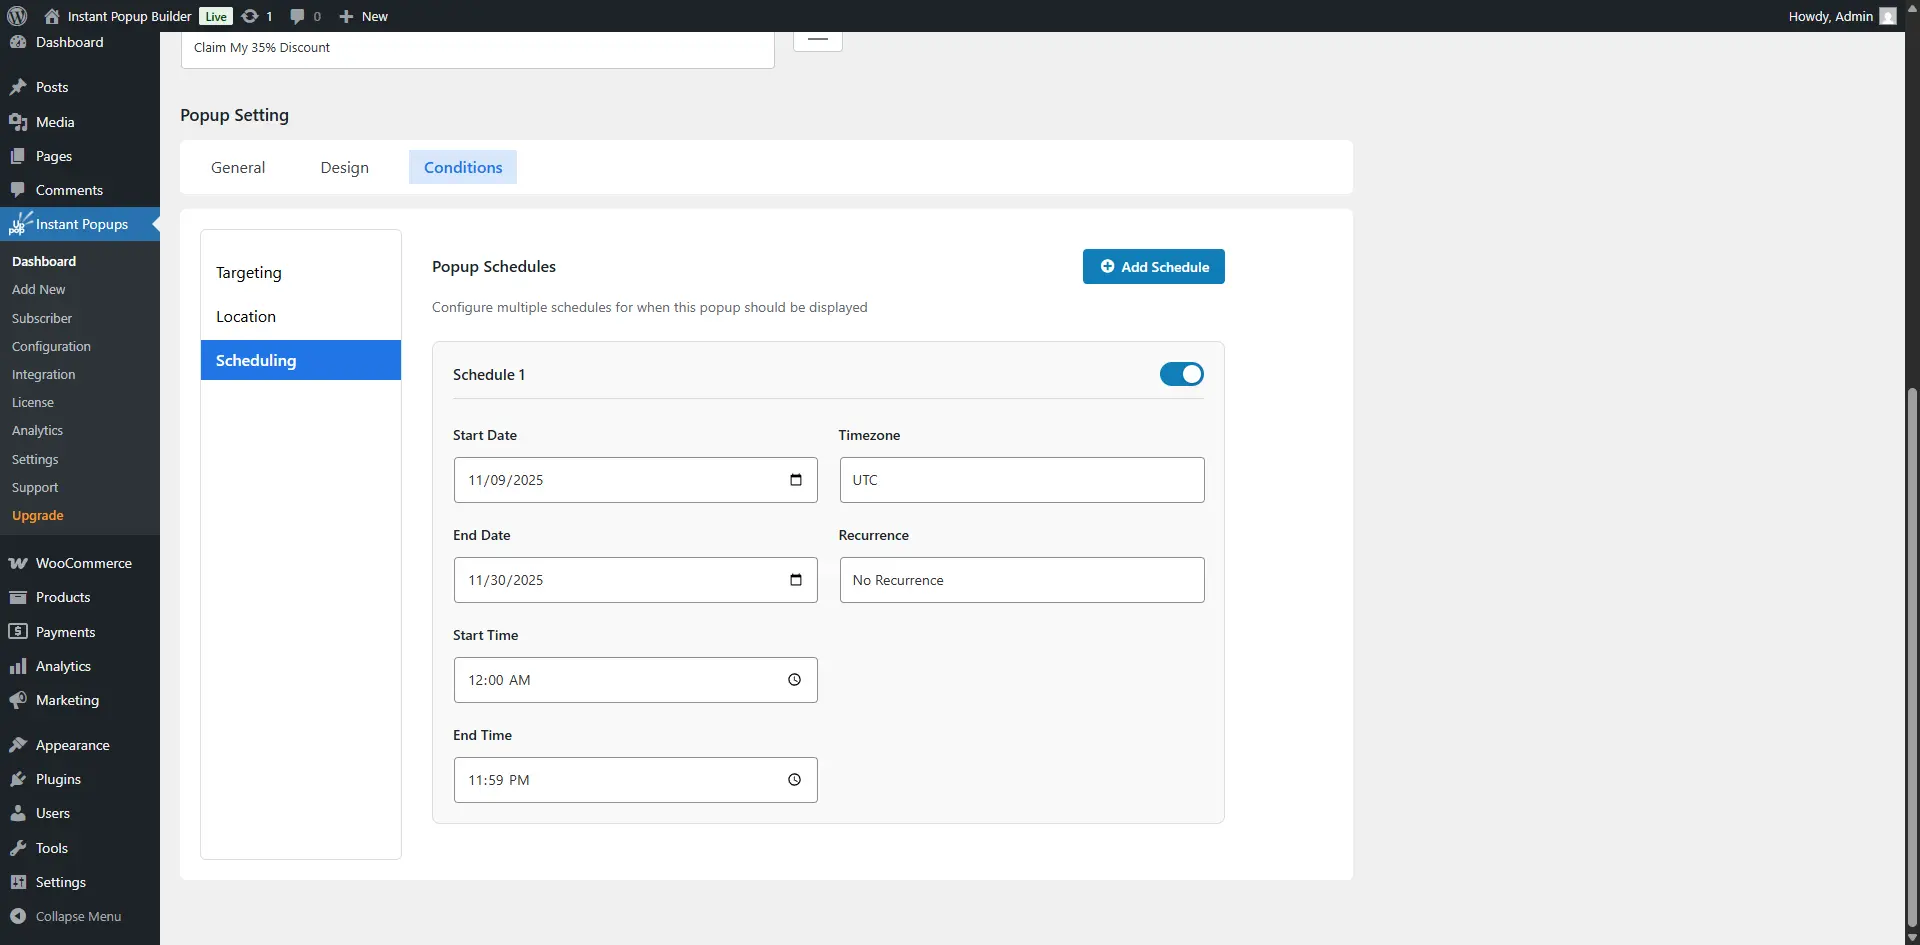
Step 3: Set Timezone and Time Range
- Timezone → Choose the correct timezone so your popup appears at the right time for your target audience.
- Start Time → The time of day when the popup should begin appearing.
- End Time → The time of day when the popup should stop appearing.
For example, if you only want to display a popup during evening hours (5:00 PM – 7:00 PM), you can set that range here.
Step 4: Set Recurrence
- Daily – The popup will repeat every day during the selected time window.
- Weekly – The popup will repeat on the same day(s) each week.
- Custom (if available) – Set your own recurrence pattern depending on campaign needs.
For example, if you are running a “Weekend Deal”, you can set the recurrence to Weekly and only select Saturday and Sunday.
Best Practices for Scheduling
- Use short schedules for flash sales. This creates urgency and avoids showing outdated promotions.
- Combine scheduling with targeting. Example: show a popup only to mobile users during a specific date range.
- Always preview before publishing. Double-check your date, time, and timezone settings to avoid confusion.
With the Scheduling extension in Instant Popup Builder, you have complete control over when your popups appear. By setting date ranges, time windows, and recurrence rules, you can automate your campaigns and ensure they’re always timely and relevant. This helps boost engagement, prevent outdated offers from showing, and saves you the hassle of manually turning popups on or off.