Best WordPress Popup Builder in 2026
Popups remain one of the most effective tools in digital marketing, helping website owners capture leads, promote offers, and increase conversions. With the evolving landscape

Popups have become an essential tool in the digital marketing world. They help capture visitor attention, generate leads, promote offers, and display important messages. If you’re looking to create a simple image popup for your WordPress website without spending any money, the Instant Popup Builder plugin is one of the best solutions available. In this article, we will guide you through the process of creating a free image popup using this plugin, customizing its behavior, and setting triggers to maximize its effectiveness.
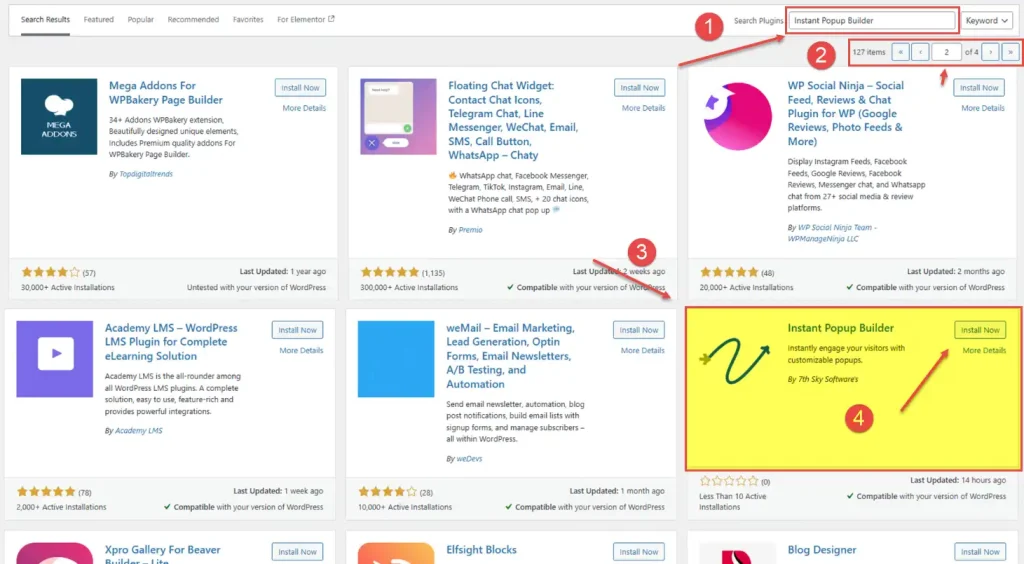
The first step in creating your image popup is to install the Instant Popup Builder plugin. Here’s how to do it:
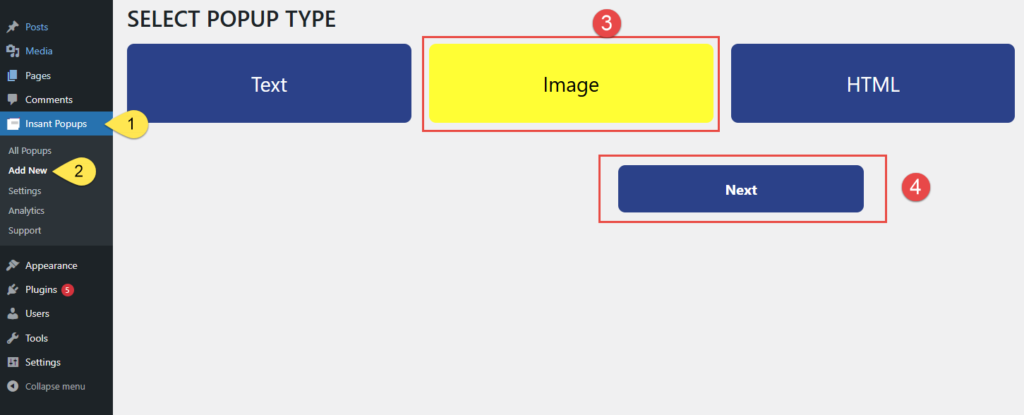
With the plugin active, you can now access Instant Popups from the menu on the left-hand side of your WordPress dashboard.
Once the plugin is activated, creating your image popup takes only a few steps:
Once published, your popup is ready to be displayed on your website.
One of the great features of the Instant Popup Builder is the flexibility it offers in terms of where and when your popup will appear. To configure this, follow these steps:
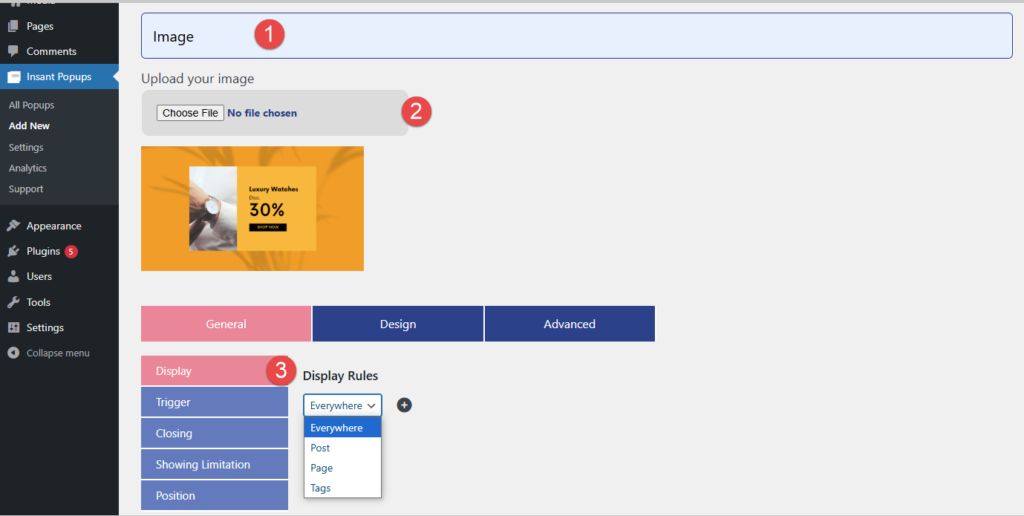
To finalize, click on the + button to apply your settings and then hit Update.
A trigger defines when or how the popup will be shown to a visitor. The Instant Popup Builder offers three basic triggers in its free version:
To configure triggers, follow these steps:
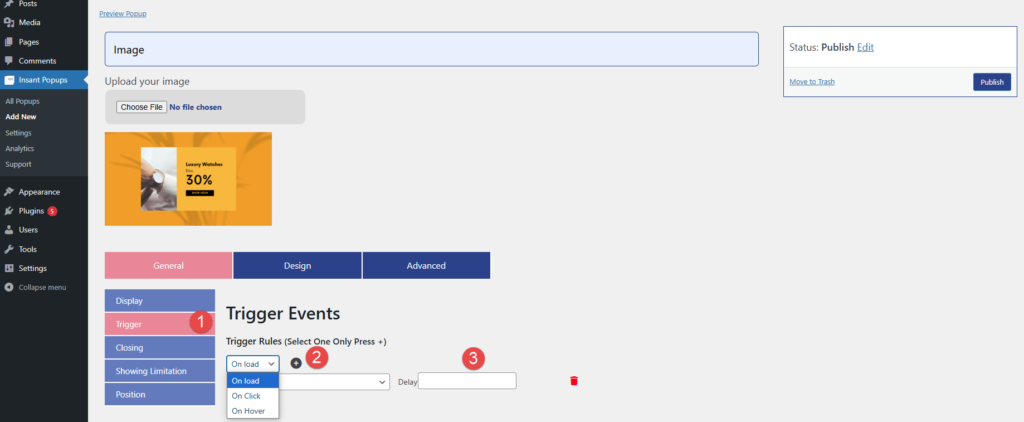
Setting appropriate triggers is crucial for enhancing the user experience. For example, a popup that appears immediately when the page loads might annoy visitors. But if it appears after a few seconds or when they hover over a specific section, it can feel more natural and less intrusive.
Customizing the close button is another key feature of the Instant Popup Builder plugin. The plugin provides several free options to manage how users can close the popup:
These settings allow you to make your popup as persistent or as subtle as you want. If you’re running a special promotion, you might want to disable certain close options, ensuring that visitors see your offer.
It’s important to avoid overloading your visitors with popups, as this can drive them away. Luckily, Instant Popup Builder allows you to set limits on how often a popup will show to each user. To do this:
These limitations ensure that your popups remain effective without becoming irritating for repeat visitors.
Creating a free image popup for your WordPress site has never been easier, thanks to the Instant Popup Builder plugin. With just a few clicks, you can have a fully functional image popup that can be customized to fit your website’s needs. From setting triggers and display limitations to controlling where your popup appears, this plugin provides an easy-to-use interface for maximizing the impact of your image popups.
By carefully designing your popups and placing them strategically, you can greatly enhance user engagement and conversions on your website.

Popups remain one of the most effective tools in digital marketing, helping website owners capture leads, promote offers, and increase conversions. With the evolving landscape

The holiday season is a golden opportunity for businesses to maximize revenue, and Christmas is often the peak of this period. With more consumers shopping

Managing email leads shouldn’t require complicated setups or multiple plugins. The new direct email integration update for Subscription Popup Pro (Extension), built for Instant Popup

In the world of digital marketing, email remains one of the most powerful tools to reach and retain customers. A subscription lightbox popup is a